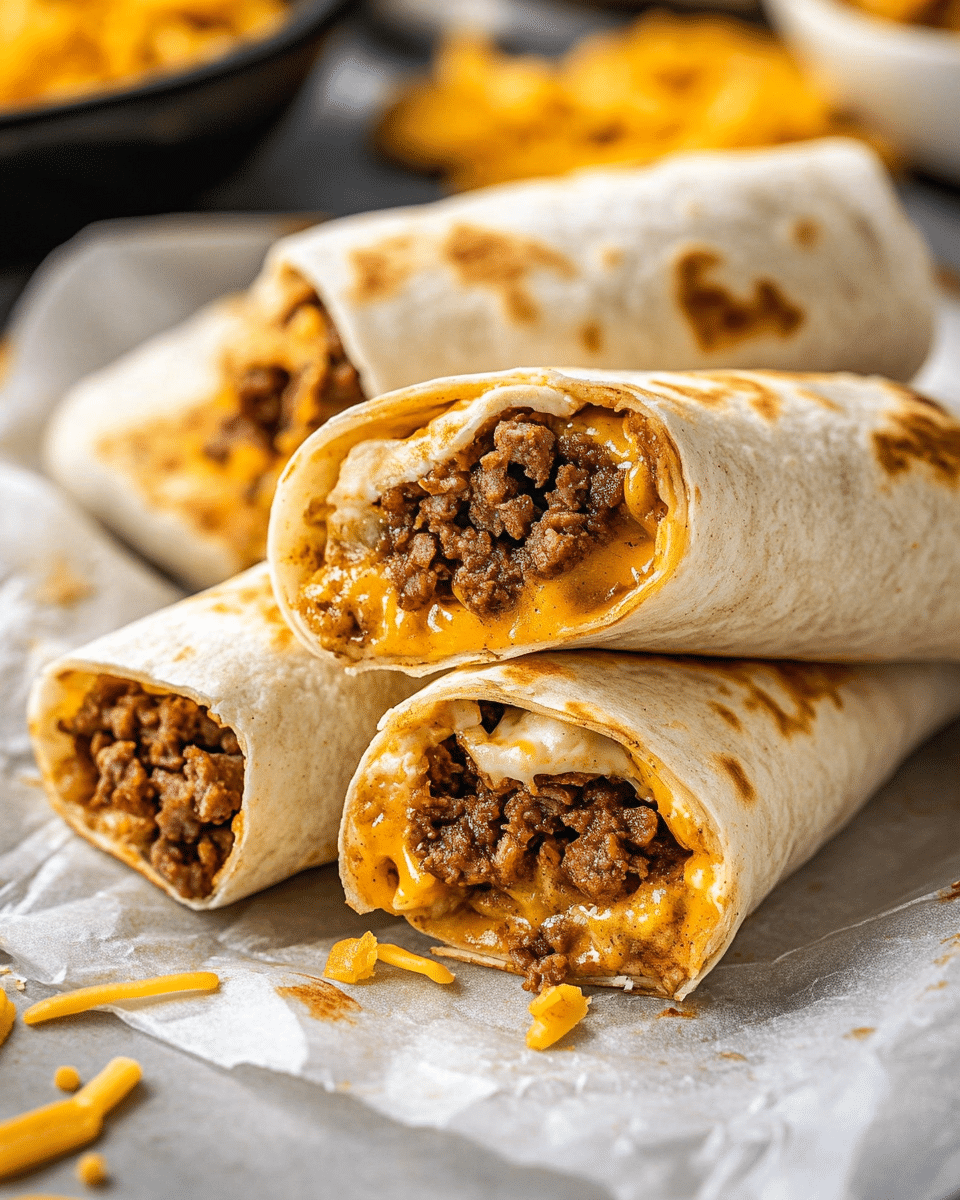
These Crunchy Beef Cheese Wraps transform ordinary tortillas into golden, crispy parcels filled with seasoned beef and melted cheese. Baked to perfection and served with cool sour cream and zesty salsa, they’re the perfect solution for a quick dinner, game day snack, or casual entertaining option.
Why You’ll Love This Recipe
- Crispy exterior with a savory, cheesy filling creates the perfect texture contrast
- Easy to make with simple ingredients you likely have on hand
- Versatile enough for dinner, lunch, or as party appetizers
- Kid-friendly while still appealing to adult tastes
- Make-ahead friendly for busy weeknights
- Customizable with your favorite toppings and fillings
- More wholesome than deep-fried alternatives
- Perfect for dipping in your favorite sauces
Ingredients
(Tip: You’ll find the full list of ingredients and measurements in the recipe card below.)
- Ground beef provides the hearty protein base for these wraps. Use lean ground beef (85/15 or 90/10) for a good balance of flavor without excessive grease. The fat content helps keep the filling moist and flavorful.
- Onion and garlic create the aromatic foundation that enhances the beef’s natural flavors. They add depth and complexity to the filling while providing subtle sweetness as they cook down.
- Taco seasoning mix is the flavor powerhouse that transforms plain ground beef into a Mexican-inspired filling. It contains a balanced blend of chili powder, cumin, paprika, and other spices that would be time-consuming to measure individually.
- Water helps to activate the seasonings in the taco mix and creates the perfect saucy consistency for the filling. It ensures the spices distribute evenly throughout the meat mixture.
- Cheddar cheese adds a sharp, tangy flavor and that classic golden melt we all love. It’s the reliable cheese that brings familiar comfort to every bite.
- Monterey Jack cheese complements the cheddar with its mild flavor and exceptional melting qualities. It creates those irresistible cheese pulls when you bite into the wrap.
- Flour tortillas serve as the versatile wrapper that transforms into a crispy exterior when baked. Choose large (burrito-size) tortillas for the best wrapping capability.
- Butter or cooking oil creates that gloriously crispy, golden exterior that makes these wraps irresistible. The fat helps the tortilla crisp up in the oven without drying out.
- Sour cream provides a cool, creamy contrast to the warm, spicy filling. Its tanginess cuts through the richness of the beef and cheese.
- Salsa adds brightness, acidity, and fresh flavor that balances the savory elements. Choose your preferred heat level to customize the experience.
- Cilantro brings a fresh, citrusy pop that lightens the dish and adds visual appeal. Its distinctive flavor complements the Mexican-inspired seasonings perfectly.
Directions
- Preheat oven to 400°F (200°C). Line a baking tray with parchment paper or lightly grease it.
- In a large skillet over medium heat, cook ground beef, onion, and garlic until beef is browned with no pink spots. Drain excess fat.
- Stir in taco seasoning and water. Simmer while stirring occasionally for 2–3 minutes until thickened. Remove from heat and let cool slightly.
- Mix in both cheeses until well combined with the beef mixture.
- Warm tortillas briefly to make them pliable.
- Spoon about ½ cup of the beef-cheese mixture onto the center of each tortilla. Fold in sides and roll tightly like burritos.
- Place wraps seam-side down on the prepared baking tray. Brush generously with melted butter or oil.
- Bake for 20–25 minutes, flipping once halfway through, until wraps are golden brown and crispy.
- Serve with sour cream, salsa, and garnish with chopped cilantro.
Servings and Timing
This recipe makes 6 generous wraps, perfect as a main dish for 6 people or can stretch to serve 12 as an appetizer when cut in half.
Prep Time: 15 minutes
Cooking Time: 25 minutes
Total Time: 40 minutes
Calories: Approximately 450 kcal per serving
Variations
- Chicken Cheese Wraps: Substitute ground chicken or shredded rotisserie chicken for the beef for a lighter option.
- Vegetarian Option: Replace the beef with a combination of black beans and corn, or use plant-based ground meat substitute.
- Spicy Kick: Add diced jalapeños or a dash of hot sauce to the filling for those who enjoy more heat.
- Breakfast Wraps: Create a morning version with scrambled eggs, breakfast sausage, and cheese for a portable breakfast.
- Mediterranean Style: Swap the taco seasoning for Mediterranean herbs, use ground lamb, and add feta cheese instead of cheddar and Monterey Jack.
- BBQ Beef: Replace taco seasoning with your favorite BBQ sauce and add caramelized onions for a sweet and tangy twist.
- Extra Veggie Boost: Add diced bell peppers, corn, or black beans to the beef mixture for added nutrition and flavor.
Storage/Reheating
- Refrigeration: Store cooled leftover wraps in an airtight container for up to 3 days. The crispy texture will soften in the refrigerator, but they’ll still be delicious.
- Freezing: These wraps freeze beautifully! Wrap each cooled wrap individually in aluminum foil, then place in a freezer-safe bag. They can be frozen for up to 3 months.
- Reheating from Refrigerated: For the best texture, reheat refrigerated wraps in a 350°F (175°C) oven for 10-15 minutes until heated through and crispy again. A toaster oven works wonderfully for smaller portions.
- Reheating from Frozen: Unwrap the frozen wraps and place them on a baking sheet. Bake at 375°F (190°C) for 15-20 minutes until heated through and crispy. There’s no need to thaw beforehand.
- Microwave Option: In a hurry? Microwave for 1-2 minutes until heated through. Note that they won’t be crispy, but they’ll still be tasty.
FAQs
Can I make these wraps ahead of time?
Yes! You can prepare the filling up to 2 days in advance and store it in the refrigerator. You can also assemble the wraps completely, cover them tightly, and refrigerate for up to 24 hours before baking. Add a few minutes to the baking time if cooking directly from the refrigerator.
How do I prevent the wraps from unfolding while baking?
Place the wraps seam-side down on the baking sheet to keep them from unfolding. The weight of the filling will help keep them closed as they bake. You can also secure them with toothpicks if needed, just remember to remove them before serving.
Can I use corn tortillas instead of flour tortillas?
Corn tortillas are not recommended for this recipe as they tend to crack when folded. Flour tortillas are more pliable and better suited for creating these wraps. If you need a gluten-free option, look for gluten-free flour tortillas.
What can I use if I don’t have taco seasoning?
You can make your own taco seasoning by combining 1 tablespoon chili powder, 1 teaspoon each of cumin and paprika, ½ teaspoon each of garlic powder, onion powder, and oregano, and ¼ teaspoon of salt and black pepper.
Can I add vegetables to the filling?
Absolutely! Diced bell peppers, corn, black beans, or chopped spinach make excellent additions. Just be sure to cook vegetables like peppers along with the beef to ensure they’re tender, and drain any excess moisture to prevent soggy wraps.
Why did my wraps get soggy?
Excess moisture is usually the culprit. Make sure to drain the beef mixture well after cooking and allow it to cool slightly before adding the cheese. Also, avoid overfilling the tortillas, as this can cause the filling to leak out during baking.
Can I make these in an air fryer?
Yes! Air fry at 375°F (190°C) for about 8-10 minutes, turning halfway through, until golden and crispy. You may need to work in batches depending on the size of your air fryer.
What dipping sauces work well with these wraps?
Beyond the traditional sour cream and salsa, try guacamole, queso dip, ranch dressing, chipotle mayo, or a cilantro-lime crema for delicious alternatives.
How can I make these wraps less spicy for kids?
Use mild taco seasoning or reduce the amount by half and add more salt to taste. You can also omit any additional hot ingredients and serve spicy toppings on the side for adults.
Can I use pre-shredded cheese?
While convenient, pre-shredded cheese contains anti-caking agents that can affect the meltability. For the creamiest, meltiest filling, shredding your own cheese from a block is recommended, but pre-shredded will work if you’re short on time.
Conclusion
These Crunchy Beef Cheese Wraps strike the perfect balance between convenience and satisfaction. Their crispy exterior gives way to a savory, cheesy filling that’s sure to please even picky eaters. Whether you’re feeding a family on a busy weeknight, looking for game day snacks, or planning casual entertaining, these versatile wraps deliver big flavor with minimal effort.
The beauty of this recipe lies in its flexibility—customize with your favorite ingredients, prepare components ahead of time, and enjoy stress-free cooking that still feels special. The contrast of textures and flavors, from the crispy tortilla to the spiced beef and melty cheese, creates a crave-worthy dish that will quickly become a regular in your recipe rotation.
Print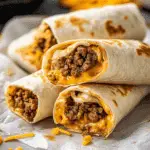
Crunchy Beef Cheese Wraps
- Total Time: 40 minutes
- Yield: 6 servings
- Diet: Halal
Description
Crunchy Beef Cheese Wraps are delicious tortillas filled with seasoned beef and melted cheese, baked until golden and crispy.
Ingredients
- 1 lb ground beef
- ½ cup diced onion
- 2 cloves garlic, crushed
- 1 packet taco seasoning mix
- ½ cup water
- 1 cup grated cheddar cheese
- 1 cup grated Monterey Jack cheese
- 6 large flour tortillas
- ¼ cup melted butter or cooking oil (for coating)
- Sour cream (for dipping)
- Salsa (for topping)
- Fresh chopped cilantro (for garnish)
Instructions
- Preheat oven to 400°F (200°C). Line a baking tray with parchment paper or lightly grease it.
- In a large skillet over medium heat, cook ground beef, onion, and garlic until beef is browned with no pink spots. Drain excess fat.
- Stir in taco seasoning and water. Simmer while stirring occasionally for 2–3 minutes until thickened. Remove from heat and let cool slightly.
- Mix in both cheeses until well combined with the beef mixture.
- Warm tortillas briefly to make them pliable.
- Spoon about ½ cup of the beef-cheese mixture onto the center of each tortilla. Fold in sides and roll tightly like burritos.
- Place wraps seam-side down on the prepared baking tray. Brush generously with melted butter or oil.
- Bake for 20–25 minutes, flipping once halfway through, until wraps are golden brown and crispy.
- Serve with sour cream, salsa, and garnish with chopped cilantro.
Notes
- To make the tortillas more pliable, briefly microwave them or heat them on a skillet.
- Add jalapeños or chili flakes to the filling if you prefer a spicier version.
- Store leftover wraps in an airtight container and reheat them in the oven for best results.
- Prep Time: 15 minutes
- Cook Time: 25 minutes
- Category: Main Course
- Method: Baking
- Cuisine: Mexican-inspired
Nutrition
- Serving Size: 1 wrap
- Calories: 450
- Sugar: 2g
- Sodium: 800mg
- Fat: 25g
- Saturated Fat: 12g
- Unsaturated Fat: 10g
- Trans Fat: 0.5g
- Carbohydrates: 30g
- Fiber: 2g
- Protein: 24g
- Cholesterol: 70mg

