Why You’ll Love This Recipe
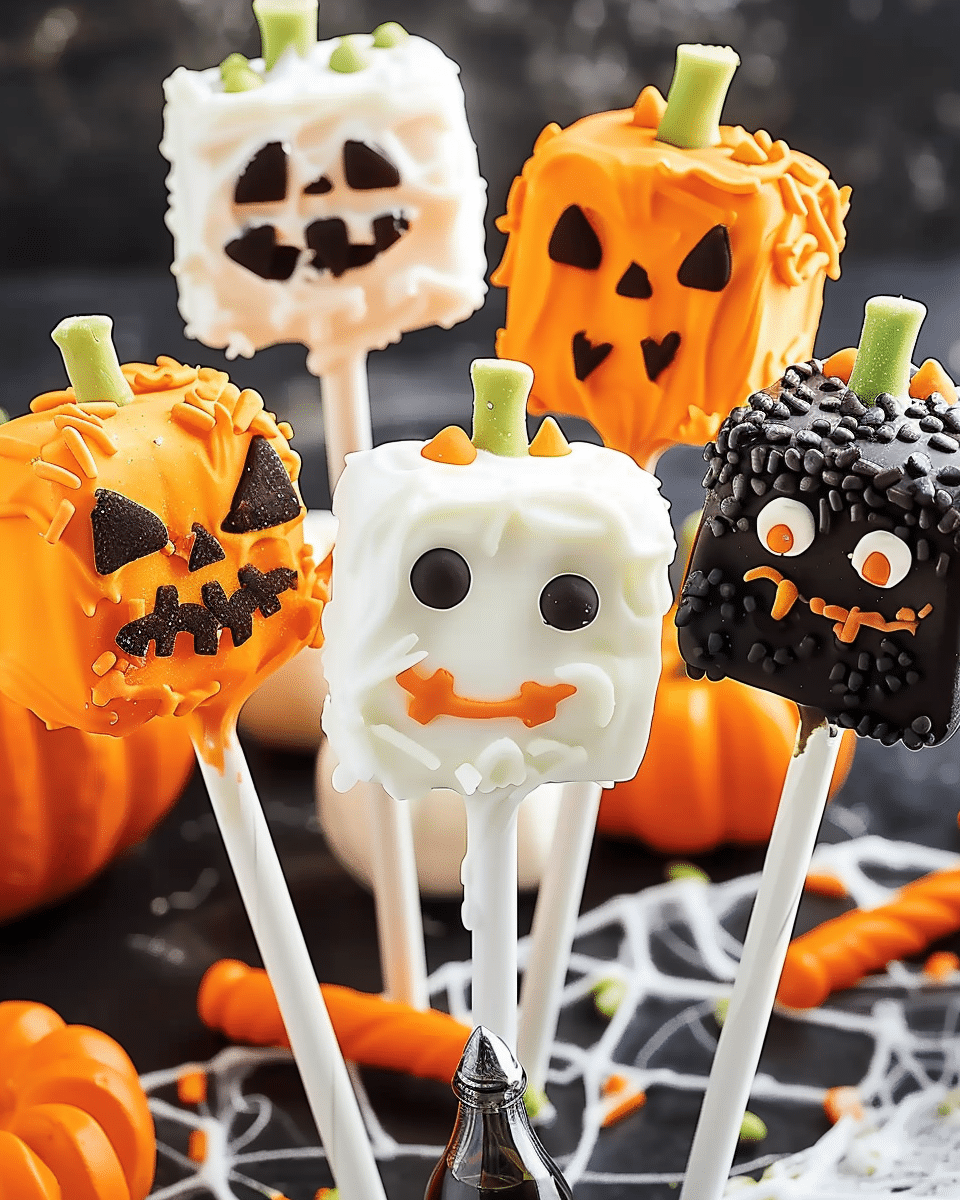
These Halloween Marshmallow Pops are not only delicious but also customizable and fun to make. The colorful candy melts give them a vibrant, playful look, and the simple designs make them an interactive craft for kids. They’re a perfect combination of marshmallow sweetness and candy coating, with endless decoration possibilities like mummies, pumpkins, or spooky faces. Whether you’re hosting a Halloween party or looking for a fun snack to make with the kids, these marshmallow pops are a hit!
Ingredients
- 24 large marshmallows
- 8 ounces orange candy melts
- 8 ounces black or green candy melts
- 1 tablespoon coconut oil or shortening (optional, for thinning)
- Halloween-themed sprinkles or candy eyes
- Lollipop sticks or paper straws
- Wax paper or parchment paper
Optional Add-Ons:
- White chocolate or colored candy melts for drizzling
- Black writing gel for faces
- Crushed Oreos or graham cracker crumbs
(Tip: You’ll find the full list of ingredients and measurements in the recipe card below.)

Directions
- Prepare Marshmallows: Insert one lollipop stick or straw into each marshmallow and set aside.
- Melt Candy Coating: In separate microwave-safe bowls, melt the orange and black or green candy melts according to the package directions. Stir in coconut oil or shortening if needed to help thin the candy coating for smoother dipping.
- Dip Marshmallows: Dip each marshmallow into one of the melted candy coatings. Rotate the marshmallow to ensure it’s evenly coated, then tap off any excess candy coating.
- Add Decorations: Before the candy coating sets, add your choice of Halloween-themed sprinkles, candy eyes, or crushed Oreos or graham cracker crumbs. Get creative with different designs like ghosts, pumpkins, mummies, or Frankenstein faces.
- Set the Pops: Place the dipped marshmallows on wax paper or stand them upright in a foam block to set for about 10–15 minutes.
- Optional Decorating: Once the candy coating has set, you can decorate further by using black writing gel to add spooky faces or drizzle with white chocolate or colored candy melts for additional designs.
- Serve: Let the marshmallow pops dry completely before serving or packaging.
Servings and Timing
- Prep time: 10 minutes
- Cook time: 10 minutes
- Total time: 20 minutes
- Yield: 24 marshmallow pops
Notes
- Fresh Marshmallows: Use fresh marshmallows to ensure the best texture and structural integrity.
- Thinning Candy Coatings: If you find the candy melts too thick, adding a little coconut oil or shortening will help achieve a smoother, more even coating.
- Quick Decorating: Candy melts set quickly, so be sure to decorate as soon as you dip the marshmallows.
- Gift Option: Wrap the pops in cellophane with a ribbon to make them great Halloween party favors or gifts.
- Storage: Store at room temperature in an airtight container for 3–5 days.
Variations
- Different Coatings: Experiment with different candy melt colors such as purple, yellow, or white for more variety and themed colors.
- Add Fun Toppings: Try topping the marshmallows with mini chocolate chips, candy corn, or Halloween sprinkles for a festive touch.
- Chocolate-Coated Pops: Dip the marshmallows in melted chocolate for a rich and indulgent twist.
Storage/Reheating
Store the marshmallow pops in an airtight container at room temperature for up to 3–5 days. They are best enjoyed fresh but will keep well for a few days, making them perfect for party prep or as a fun snack throughout the Halloween season.

FAQs
Can I use marshmallow fluff instead of whole marshmallows?
Whole marshmallows work best for this recipe, but if you prefer marshmallow fluff, you can create a similar effect by piping it onto sticks or straws.
Can I make these marshmallow pops ahead of time?
Yes! You can make them ahead of time and store them at room temperature in an airtight container for up to 3-5 days.
How can I make the pops more festive?
Get creative with your designs! Use candy melts to drizzle patterns, add candy eyes or sprinkles, and even write Halloween messages like “Boo!” or “Trick or Treat” on the marshmallows.
Can I make these marshmallow pops vegan?
Yes, you can use vegan marshmallows and plant-based candy melts to make these marshmallow pops vegan-friendly.
Conclusion
These Spooky and Fun Halloween Marshmallow Pops are a fantastic, no-bake treat that’s perfect for kids and parties. With their colorful candy coating and fun, creative decorations, they’re a Halloween favorite that’s as delicious as it is playful. Whether you’re serving them at a party, making them with kids, or gifting them as party favors, these marshmallow pops are sure to be a hit!
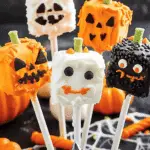
Spooky and Fun Halloween Marshmallow Pops for Kids and Parties
- Total Time: 20 minutes
- Yield: 24 marshmallow pops
- Diet: Vegetarian
Description
These Spooky and Fun Halloween Marshmallow Pops are the perfect no-bake treat for Halloween. With vibrant candy coatings, playful designs, and fun decorations, they are ideal for parties or as a fun family activity.
Ingredients
24 large marshmallows
8 ounces orange candy melts
8 ounces black or green candy melts
1 tablespoon coconut oil or shortening (optional, for thinning)
Halloween-themed sprinkles or candy eyes
Lollipop sticks or paper straws
Wax paper or parchment paper
Optional Add-Ons: White chocolate or colored candy melts for drizzling, Black writing gel for faces, Crushed Oreos or graham cracker crumbs
Instructions
- Prepare Marshmallows: Insert one lollipop stick or straw into each marshmallow and set aside.
- Melt Candy Coating: In separate microwave-safe bowls, melt the orange and black or green candy melts according to the package directions. Stir in coconut oil or shortening if needed to help thin the candy coating for smoother dipping.
- Dip Marshmallows: Dip each marshmallow into one of the melted candy coatings. Rotate the marshmallow to ensure it’s evenly coated, then tap off any excess candy coating.
- Add Decorations: Before the candy coating sets, add your choice of Halloween-themed sprinkles, candy eyes, or crushed Oreos or graham cracker crumbs. Get creative with different designs like ghosts, pumpkins, mummies, or Frankenstein faces.
- Set the Pops: Place the dipped marshmallows on wax paper or stand them upright in a foam block to set for about 10–15 minutes.
- Optional Decorating: Once the candy coating has set, you can decorate further by using black writing gel to add spooky faces or drizzle with white chocolate or colored candy melts for additional designs.
- Serve: Let the marshmallow pops dry completely before serving or packaging.
Notes
Use fresh marshmallows to ensure the best texture and structural integrity.
If you find the candy melts too thick, adding a little coconut oil or shortening will help achieve a smoother, more even coating.
Candy melts set quickly, so be sure to decorate as soon as you dip the marshmallows.
Wrap the pops in cellophane with a ribbon to make them great Halloween party favors or gifts.
Store at room temperature in an airtight container for 3–5 days.
- Prep Time: 10 minutes
- Cook Time: 10 minutes
- Category: Dessert
- Method: No-bake
- Cuisine: American
Nutrition
- Serving Size: 1 pop
- Calories: 150
- Sugar: 18g
- Sodium: 50mg
- Fat: 7g
- Saturated Fat: 4g
- Unsaturated Fat: 2g
- Trans Fat: 0g
- Carbohydrates: 22g
- Fiber: 0g
- Protein: 1g
- Cholesterol: 15mg

