I love this recipe because it’s the ultimate combination of convenience and indulgence. It takes only a few simple ingredients to create a dessert that looks impressive and tastes even better. There’s no baking involved, and I can make it ahead of time, which makes it perfect for holidays, potlucks, or whenever I need a quick crowd-pleaser. The creamy layers of cream cheese, pudding, and whipped topping all on an Oreo crust make this dessert truly heavenly.
Ingredients
(Note: All ingredient amounts are listed in the recipe card below.)
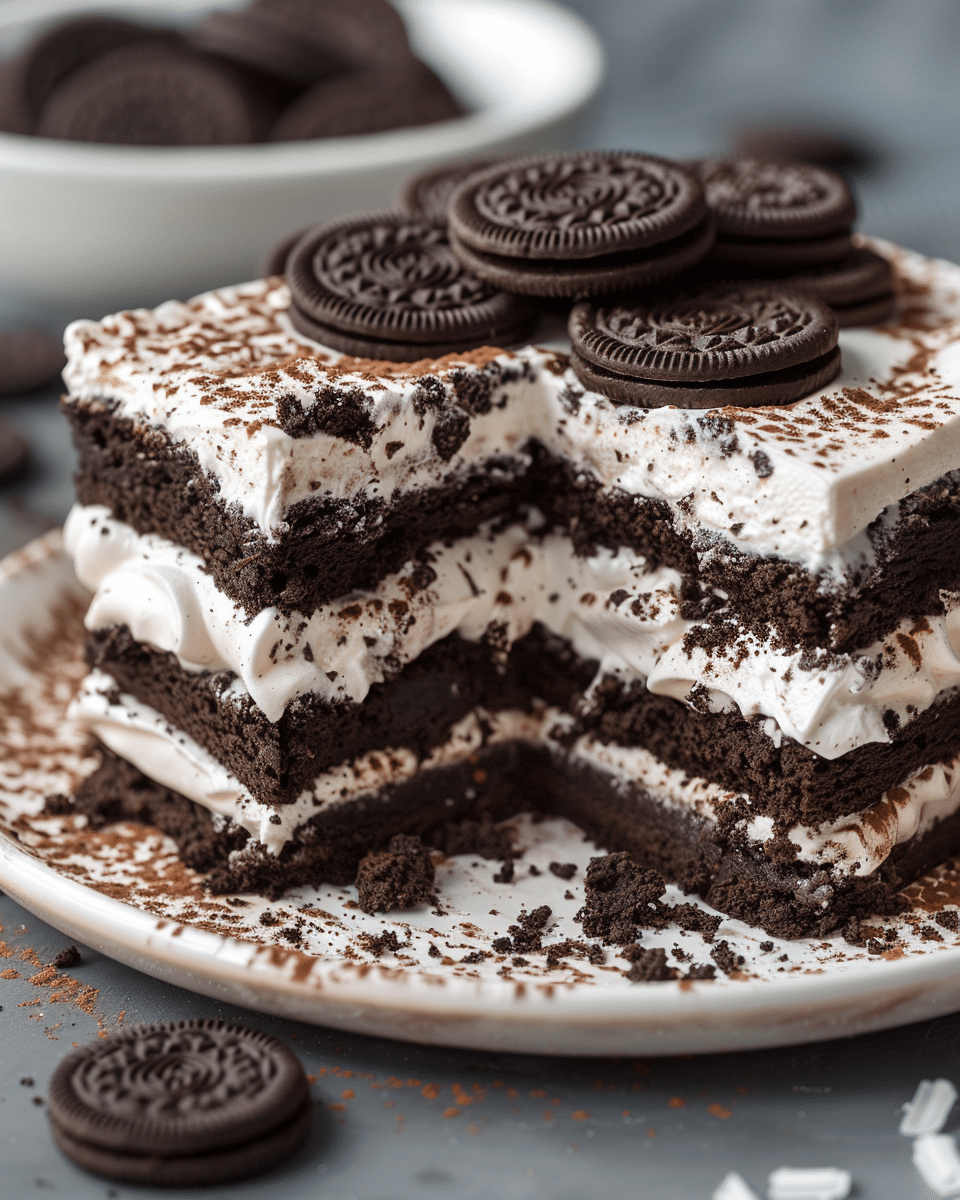
I crush the entire package of Oreo cookies using a food processor or by sealing them in a zip-top bag and crushing them with a rolling pin until fine crumbs form. I reserve about ½ cup of crumbs for garnish.
In a medium bowl, I mix the remaining cookie crumbs with the melted butter until evenly moistened. I press this mixture firmly into the bottom of a 9×13-inch dish to form the crust.
In a large mixing bowl, I beat the softened cream cheese and powdered sugar together until smooth and creamy. I fold in half of the whipped topping until fully combined. I spread this layer evenly over the Oreo crust.
In another bowl, I whisk together the cold milk and instant chocolate pudding mixes until thickened, about 2 minutes. I pour and spread this pudding layer over the cream cheese layer.
I spread the remaining whipped topping evenly over the pudding layer, smoothing it with a spatula.
I finish by sprinkling the reserved Oreo crumbs and optional chocolate shavings on top for a decorative touch.
I refrigerate the dessert for at least 4 hours, or until fully set. Once chilled, I slice it into squares and serve it cold.
Servings and Timing
This recipe makes about 12–15 servings. Prep Time: 30 minutes Chill Time: 4 hours Total Time: 4 hours 30 minutes (mostly chilling)
Variations
I sometimes make this dessert with different pudding flavors—like vanilla, white chocolate, or even peanut butter—to change things up. For an extra decadent version, I drizzle chocolate syrup or caramel sauce between the layers. If I want a minty twist, I use mint Oreos and add a few drops of peppermint extract to the cream cheese mixture. I’ve also made it with golden Oreos for a lighter, vanilla variation that’s just as delicious.
Storage/Reheating
I store leftovers covered in the refrigerator for up to 4 days. Since this dessert is chilled, there’s no reheating necessary—just serve it straight from the fridge. For longer storage, I freeze portions in airtight containers for up to 2 months. When I’m ready to enjoy them, I thaw the slices in the refrigerator overnight before serving.
FAQs
Can I use homemade whipped cream instead of Cool Whip?
Yes, I can use homemade whipped cream, but I make sure it’s stabilized with a bit of powdered sugar so it holds up well.
Can I make this dessert ahead of time?
Absolutely. It’s best made a day ahead since it needs several hours to chill and set properly.
Do I need to remove the cream from the Oreos before crushing?
No, I crush the cookies whole—the cream filling helps bind the crust.
Can I use different pudding flavors?
Yes, I’ve used vanilla, white chocolate, or even cheesecake pudding for variety.
How do I make it extra firm for slicing?
I chill it overnight to ensure all layers are set before cutting.
Can I make this dessert gluten-free?
Yes, by using gluten-free chocolate sandwich cookies and gluten-free pudding mix.
Can I use reduced-fat ingredients?
Yes, low-fat cream cheese and light whipped topping work fine, though the texture might be slightly lighter.
How long does it need to chill?
At least 4 hours, but overnight gives the best results.
Can I add toppings besides Oreos?
I sometimes add chocolate curls, mini chocolate chips, or crushed toffee bits on top.
What’s the best way to crush the Oreos without a food processor?
I place them in a zip-top bag and roll over them with a rolling pin until finely crushed.
Conclusion
I find this heavenly Oreo dessert to be one of the easiest and most crowd-pleasing sweets I can make. The layers of chocolate pudding, creamy filling, and crunchy Oreo crust come together in the most satisfying way. It’s rich, decadent, and truly lives up to its name. Whether for a special occasion or just a night in, this no-bake dessert is pure comfort in every bite.
This Heavenly Oreo Dessert is a rich, creamy, and chocolatey no-bake treat made with layers of Oreo crust, sweet cream cheese filling, chocolate pudding, and whipped topping. It’s the ultimate crowd-pleaser that’s easy to make, perfectly indulgent, and always a hit at any gathering.
Optional: extra Oreo crumbs or chocolate shavings for garnish
Instructions
Make the crust: Crush Oreos (with filling) into fine crumbs using a food processor or a zip-top bag and rolling pin. Reserve ½ cup of crumbs for garnish. Mix remaining crumbs with melted butter and press firmly into the bottom of a 9×13-inch dish. Chill while preparing the filling.
Prepare the cream layer: In a large bowl, beat softened cream cheese and powdered sugar until smooth. Fold in half of the whipped topping. Spread evenly over the chilled crust.
Make the pudding layer: In another bowl, whisk together cold milk and pudding mixes until thickened (about 2 minutes). Spread the pudding over the cream cheese layer.
Add topping: Spread remaining whipped topping over the pudding layer. Smooth the top and sprinkle reserved Oreo crumbs and chocolate shavings for garnish.
Chill and serve: Refrigerate for at least 4 hours or overnight to set. Slice and serve cold.
Notes
No need to remove Oreo cream filling before crushing—it helps bind the crust.
For a flavor twist, use vanilla, white chocolate, or peanut butter pudding.
Chill overnight for the cleanest, firmest slices.
Top with mini chocolate chips, toffee bits, or drizzle with chocolate syrup for extra indulgence.
Use gluten-free Oreos and pudding mix for a gluten-free version.


