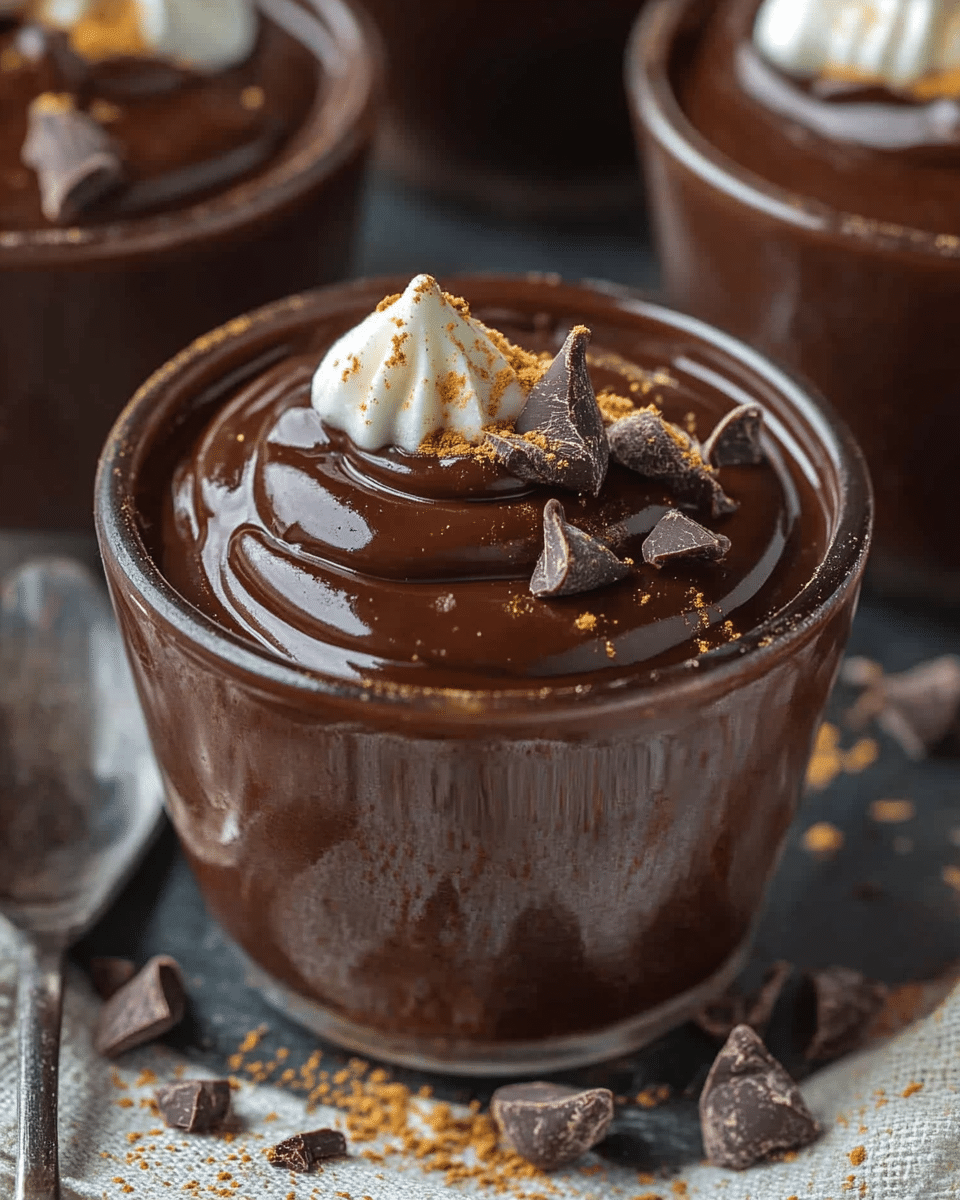
A velvety smooth, rich chocolate pudding made from scratch in just 20 minutes. This nostalgic dessert skips the box mix for a deeply satisfying homemade treat that’s perfect for any occasion.
Why You’ll Love This Recipe
This homemade chocolate pudding recipe delivers pure comfort in every spoonful. Unlike store-bought versions, you’ll taste the difference with its rich, authentic chocolate flavor and silky-smooth texture. It’s surprisingly simple to make with basic pantry ingredients, taking just 20 minutes of active cooking time. Whether served warm for a cozy treat or chilled for a refreshing dessert, this versatile pudding can be dressed up or down for any occasion. Plus, making it from scratch means you control the ingredients – no artificial flavors, colors, or preservatives. Perfect for chocolate lovers of all ages!
Ingredients
(Tip: You’ll find the full list of ingredients and measurements in the recipe card below.)
Granulated sugar provides the perfect level of sweetness to balance the rich cocoa flavor. It dissolves completely during cooking, contributing to the pudding’s smooth texture. You can experiment with reducing the amount slightly if you prefer a less sweet dessert.
Unsweetened cocoa powder is the star ingredient that delivers deep chocolate flavor without adding extra fat. Natural or Dutch-processed cocoa both work well here, though Dutch-processed will give a slightly smoother, more mellow chocolate taste.
Cornstarch acts as the thickening agent, transforming the liquid mixture into a luxurious pudding texture. Be sure to fully dissolve it in cold milk before heating to prevent lumps from forming.
Salt might seem insignificant, but this pinch enhances all the flavors and balances the sweetness. Don’t skip it—even a small amount makes a noticeable difference in the final taste.
Milk creates the creamy base of your pudding. Whole milk will produce the richest results, but 2% works well too. Plant-based alternatives like almond or oat milk can be substituted for a dairy-free version, though the texture may vary slightly.
Unsalted butter adds a silky mouthfeel and richness when stirred in at the end. The heat of the pudding melts it perfectly, incorporating a subtle buttery note that elevates the entire dessert.
Vanilla extract complements and enhances the chocolate flavor with its warm, aromatic properties. Pure vanilla extract offers the best flavor, but imitation vanilla will work in a pinch.
Directions
- In a medium saucepan, combine the granulated sugar, unsweetened cocoa powder, cornstarch, and salt. Whisk these dry ingredients together thoroughly to ensure there are no lumps, especially in the cocoa powder.
- Gradually add the cold milk to the dry mixture, whisking constantly until completely smooth. Starting with cold milk helps prevent lumps from forming in the cornstarch.
- Place the saucepan over medium heat and cook the mixture, stirring constantly with a wooden spoon or heatproof spatula. Make sure to scrape the bottom and sides of the pan to prevent scorching.
- Continue cooking and stirring until the mixture comes to a boil. You’ll notice it beginning to thicken as it heats. This typically takes about 8-10 minutes.
- Once the pudding reaches a full boil and has thickened considerably, immediately remove it from the heat. The pudding should coat the back of a spoon and leave a clear path when you run your finger through it.
- Add the butter and vanilla extract to the hot pudding and stir until the butter is completely melted and incorporated. This adds richness and flavor to the finished dessert.
- Allow the pudding to cool slightly, stirring occasionally to prevent a skin from forming on top. If you prefer a skin-free pudding, press plastic wrap directly onto the surface while cooling.
- Serve the pudding warm for a comforting treat, or refrigerate for at least 2 hours until chilled for a more traditional cold pudding dessert.
Servings and Timing
This recipe yields 8 generous servings of approximately 1/2 cup each, making it perfect for family desserts or small gatherings. The preparation takes just 10 minutes, with another 10 minutes of cooking time. Allow 20 minutes for cooling before serving warm, or refrigerate for at least 2 hours if you prefer it chilled. The total time from start to finish is approximately 40 minutes, with 184 calories per serving.
Variations
Dark Chocolate Pudding: Substitute half of the cocoa powder with high-quality dark cocoa powder and reduce the sugar by 1/4 cup for a more intense, less sweet chocolate experience.
Chocolate-Orange Pudding: Add 1 tablespoon of orange zest and replace the vanilla extract with 1/2 teaspoon of orange extract for a citrusy twist that complements the chocolate beautifully.
Chocolate Mint Pudding: Replace the vanilla extract with 1/2 teaspoon of mint extract for a refreshing mint chocolate flavor, perfect for holiday gatherings.
Mocha Pudding: Dissolve 1 tablespoon of instant espresso powder into the milk before adding to the dry ingredients for a sophisticated coffee-chocolate combination.
Mexican Chocolate Pudding: Add 1 teaspoon of ground cinnamon and a pinch of cayenne pepper to the dry ingredients for a warm, spicy variation inspired by traditional Mexican chocolate.
Chocolate Coconut Pudding: Substitute half of the milk with coconut milk and sprinkle toasted coconut flakes on top before serving for a tropical twist.
Storage/Reheating
The pudding can be stored in an airtight container in the refrigerator for up to 5 days. To prevent a skin from forming during storage, press plastic wrap directly onto the surface of the pudding before covering with a lid.
For individual servings, portion the pudding into small containers or ramekins before refrigerating for grab-and-go treats throughout the week.
If you prefer warm pudding after refrigeration, reheat individual portions in the microwave at 50% power in 30-second intervals, stirring between each interval until it reaches your desired temperature. Be careful not to overheat, as this can cause the pudding to separate.
Alternatively, gently reheat larger portions in a saucepan over low heat, stirring constantly to ensure even warming and to prevent scorching on the bottom.
This pudding is not suitable for freezing, as the texture can become grainy and watery when thawed.
FAQs
Can I use non-dairy milk to make this chocolate pudding?
Yes, you can substitute the dairy milk with alternatives like almond, soy, oat, or coconut milk. Keep in mind that the flavor and texture may vary slightly. Coconut milk will create a richer pudding, while almond milk might result in a slightly thinner consistency. You may need to adjust the cornstarch by adding an extra tablespoon for thinner milk alternatives.
Why did my pudding turn out lumpy?
Lumps typically form when the cornstarch isn’t fully dissolved in cold liquid before heating or when the mixture isn’t stirred constantly during cooking. To prevent lumps, whisk the dry ingredients thoroughly, add cold milk gradually while whisking, and stir continuously during the heating process. If you still end up with lumps, straining the hot pudding through a fine-mesh sieve can help rescue it.
How can I tell when my pudding is thick enough?
The pudding is ready when it reaches a full boil and noticeably thickens, coating the back of a spoon. When you run your finger through the coating on the spoon, it should leave a clear path that doesn’t immediately fill in. Remember that the pudding will continue to thicken as it cools, so don’t be concerned if it seems slightly loose when hot.
Can I reduce the sugar in this recipe?
Yes, you can reduce the sugar by up to 1/3 cup without significantly affecting the texture. The pudding will be less sweet but still maintain its chocolate flavor. If using very dark or bitter cocoa powder, you might want to keep more sugar to balance the intensity.
Is it necessary to use unsalted butter?
While unsalted butter is preferred as it allows you to control the salt content precisely, you can use salted butter in a pinch. If using salted butter, omit the pinch of salt from the recipe to avoid oversalting the pudding.
Why does my pudding form a skin on top as it cools?
The skin forms as moisture evaporates from the surface of the hot pudding. To prevent this, press plastic wrap directly onto the surface of the pudding while it’s still hot. Some people enjoy the skin as a nostalgic element of homemade pudding, so this step is based on personal preference.
Can I make this pudding ahead of time for a party?
Absolutely! This pudding can be made up to 3 days in advance and stored in the refrigerator. For a special presentation, consider preparing individual serving cups topped with whipped cream just before serving. The make-ahead capability makes it an excellent dessert option for entertaining.
What’s the difference between chocolate pudding and chocolate custard?
The main difference is that pudding is thickened primarily with cornstarch or other starches, while custard relies on eggs for thickening. This gives pudding a silkier, more gelatinous texture, while custard has a richer, creamier consistency. Pudding is also typically easier and faster to prepare than custard.
My pudding didn’t thicken properly. What went wrong?
Insufficient thickening can result from not cooking the mixture long enough, not bringing it to a full boil, or inaccurate measurement of the cornstarch. The cornstarch needs to reach boiling temperature to activate its full thickening power. If your pudding is still too thin after cooling, you can reheat it and mix in a slurry of 1 tablespoon cornstarch dissolved in 2 tablespoons cold water.
Can I use this pudding as a pie filling?
Yes! This chocolate pudding makes an excellent pie filling. Simply prepare the pudding as directed, then pour it into a pre-baked pie crust while still hot. Allow it to cool completely, then refrigerate for at least 4 hours or overnight before serving. Top with whipped cream for a classic chocolate pudding pie.
Conclusion
This homemade chocolate pudding recipe brings together simple ingredients to create a dessert that’s infinitely more satisfying than any store-bought version. The velvety texture and deep chocolate flavor make it a standout treat that’s sure to become a family favorite. Whether you serve it warm from the stove for a cozy evening treat or chilled for a refreshing summer dessert, this versatile pudding adapts to any occasion.
By making chocolate pudding from scratch, you’re not only treating yourself to superior flavor but also connecting with a timeless culinary tradition that spans generations. The process itself—watching the transformation from simple ingredients to silky pudding—offers its own reward, especially when shared with eager helpers in the kitchen.
So the next time you’re craving something sweet, skip the box mix and treat yourself to this homemade chocolate pudding. With just 20 minutes of cooking time and ingredients you likely already have on hand, there’s every reason to indulge in this simple yet spectacular dessert.
Print
Homemade Chocolate Pudding
- Total Time: 40 minutes
- Yield: 8 servings
- Diet: Vegetarian
Description
A rich and creamy homemade chocolate pudding that’s easy to make and perfect for dessert.
Ingredients
1 ⅓ cup granulated sugar
⅔ cup unsweetened cocoa powder
⅓ cup cornstarch
Pinch of salt
4 ½ cups milk
3 tablespoons unsalted butter
1 teaspoon vanilla extract
Instructions
- In a saucepan, combine sugar, cocoa powder, salt, and cornstarch. Whisk in cold milk until smooth.
- Heat over medium, stirring constantly until the mixture reaches a boil.
- As soon as it thickens, remove from heat and stir in butter and vanilla.
- Let the pudding cool, stirring occasionally to prevent a skin from forming.
- Serve chilled or warm.
Notes
Stir occasionally while cooling to prevent a skin from forming.
Serve topped with whipped cream or fresh fruit for extra flavor.
Use whole milk for a creamier texture.
- Prep Time: 10 minutes
- Cook Time: 10 minutes
- Category: Dessert
- Method: Stovetop
- Cuisine: American
Nutrition
- Serving Size: 1 serving
- Calories: 184 kcal
- Sugar: 21 g
- Sodium: 38 mg
- Fat: 6 g
- Saturated Fat: 3.5 g
- Unsaturated Fat: 2 g
- Trans Fat: 0 g
- Carbohydrates: 30 g
- Fiber: 2 g
- Protein: 4 g
- Cholesterol: 15 mg

