I love how effortless yet impressive these cheesecakes are. The combination of the crunchy chocolate biscuit base, creamy minty filling, and the melting center of the Lindt chocolate ball makes every bite luxurious. I also love that I can prepare them ahead of time — perfect for entertaining or when I want a make-ahead dessert that looks like I’ve spent hours in the kitchen. The cool mint flavor is refreshing without being overpowering, and the vibrant green tint makes them look as good as they taste.
Ingredients
(Note: All ingredient amounts are listed in the recipe card below.)
8 Arnott’s Choc Ripple biscuits 250g cream cheese, at room temperature, chopped 125ml (1/2 cup) sweetened condensed milk 1 egg Green liquid food colouring 8 Lindt Lindor Milk Mint Chocolate Balls, unwrapped Whipped cream and grated chocolate, to serve
Directions
I preheat my oven to 160°C (140°C fan-forced) and line eight 80ml (1/3 cup) muffin pans with paper cases. I place one Choc Ripple biscuit in the base of each pan to form the crust.
In a large mixing bowl, I use electric beaters to beat the cream cheese and condensed milk until smooth and creamy. I add the egg and beat again until fully combined.
I add a few drops of green food colouring and beat until the colour is evenly distributed.
I spoon about 1 tablespoon of the mixture into each muffin pan, then gently place one Lindt Mint Chocolate Ball in the center of each. I cover each chocolate with the remaining cream cheese mixture, dividing it evenly among the pans.
I bake the cheesecakes for 15 minutes or until they’re just set. Once done, I let them cool completely in the pan, then refrigerate for at least 4 hours (or overnight) until firm.
To serve, I run a flat-bladed knife around the edge of each cheesecake to loosen it, then carefully lift them out. I top each with a dollop of whipped cream and a sprinkle of grated chocolate.
Sometimes I switch up the flavour by using different Lindt balls — hazelnut, caramel, or dark chocolate all work beautifully. For a non-mint version, I leave out the food colouring and use a plain milk chocolate truffle instead. When I want a festive twist, I top them with crushed candy canes or chocolate shavings for extra crunch. You can also make a larger version in a 20cm springform pan — just adjust the baking time to around 30–35 minutes.
Storage/Reheating
I store the cheesecakes in an airtight container in the fridge for up to 3 days. Since they’re bite-sized and chilled, they’re best served straight from the fridge. I don’t reheat them, but if I make them ahead of time, I add the whipped cream topping just before serving to keep it fresh.
FAQs
Can I make these ahead of time?
Yes, I love making them a day in advance — they set beautifully in the fridge overnight.
Can I use another type of biscuit for the base?
Yes, Oreos or chocolate digestives also work well.
Can I skip the food colouring?
Of course! The green tint is just for presentation — the flavour won’t change if you leave it out.
Can I use other types of chocolate truffles?
Definitely. Any filled chocolate truffle or praline center works nicely inside the cheesecake.
Can I freeze these mini cheesecakes?
Yes, I freeze them without the topping for up to a month. I thaw them overnight in the fridge before serving.
Can I make them without paper cases?
Yes, but I make sure to grease the muffin pan well so they release easily.
What can I use instead of condensed milk?
Cream and sugar can substitute in a pinch, though the texture won’t be quite as smooth.
How do I know when they’re baked perfectly?
They should look set around the edges but still slightly wobbly in the center. They’ll firm up as they cool.
Can I make these without eggs?
Yes, I can replace the egg with 2 tablespoons of sour cream for a similar creamy texture.
How can I make the topping more decorative?
I sometimes add chocolate curls, mint leaves, or drizzle melted dark chocolate over the top.
Conclusion
These Mini Mint Drop Cheesecakes are everything I love in a dessert — simple, elegant, and bursting with flavor. The creamy mint filling hides a molten chocolate center that surprises everyone at first bite. With minimal prep and easy ingredients, they’re perfect for any gathering or when I want a cool, indulgent treat that looks effortlessly impressive.
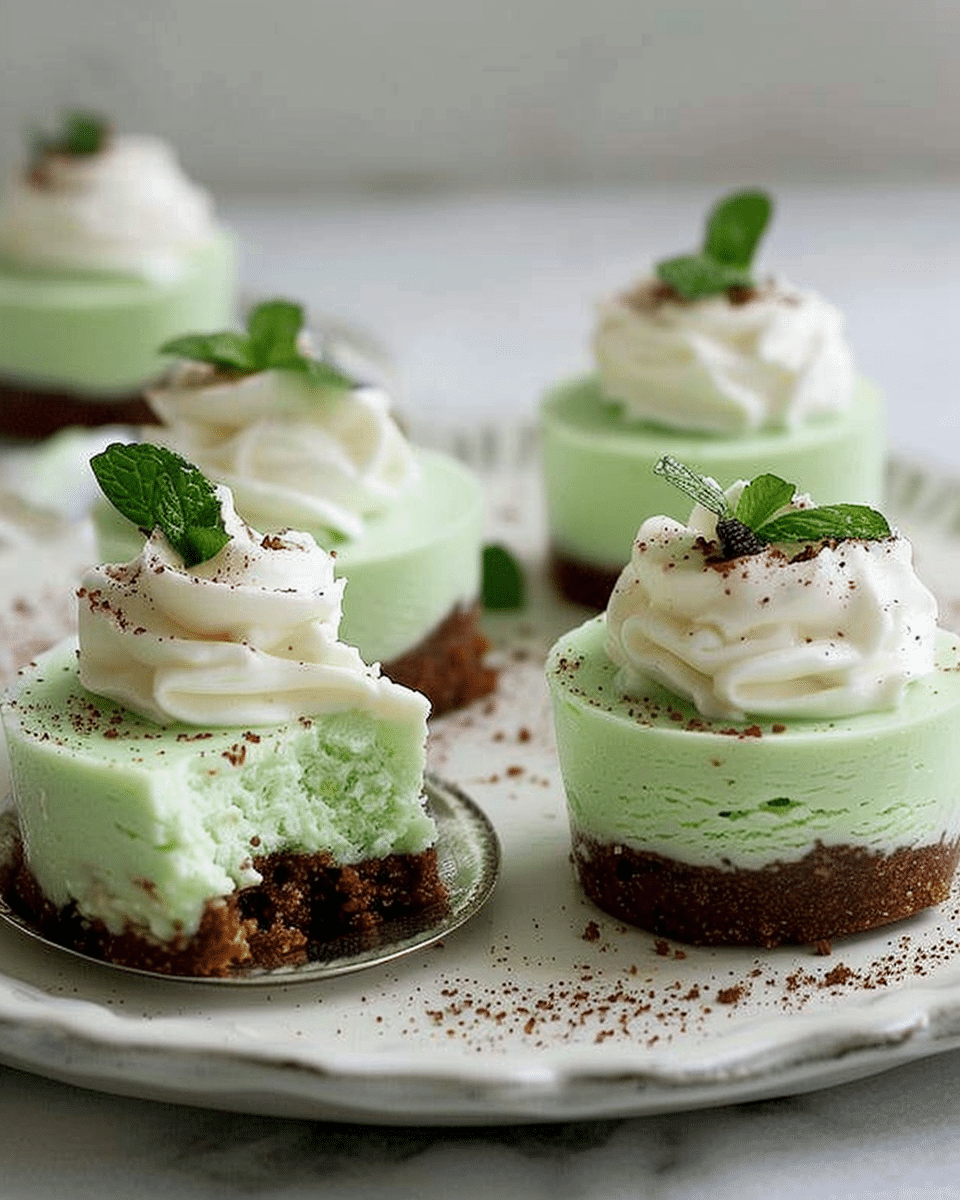
These Mini Mint Drop Cheesecakes are elegant, bite-sized desserts with a creamy mint filling, a surprise Lindt Mint Chocolate center, and a crisp Choc Ripple biscuit base. Topped with whipped cream and grated chocolate, they’re refreshingly rich, perfectly portioned, and irresistibly smooth — ideal for entertaining or a special after-dinner treat.
Ingredients
8 Arnott’s Choc Ripple biscuits
250 g cream cheese, at room temperature, chopped
125 ml (½ cup) sweetened condensed milk
1 egg
Green liquid food colouring
8 Lindt Lindor Milk Mint Chocolate Balls, unwrapped
Whipped cream and grated chocolate, to serve
Instructions
Prepare the base: Preheat oven to 160°C (140°C fan-forced). Line eight 80 ml (⅓ cup) muffin pans with paper cases. Place one Choc Ripple biscuit in the base of each to form the crust.
Make the filling: Beat cream cheese and condensed milk together with electric beaters until smooth. Add the egg and beat until well combined. Tint with a few drops of green food colouring and mix until evenly colored.
Assemble: Spoon 1 tablespoon of filling into each muffin pan. Place one Lindt Mint Chocolate Ball in the center of each, then cover evenly with remaining filling.
Bake: Bake for 15 minutes or until just set. Let cool completely in the pan, then refrigerate for at least 4 hours (or overnight) until firm.
Serve: Carefully lift cheesecakes from the pans. Top each with whipped cream and sprinkle with grated chocolate. Serve chilled.
Notes
Swap Lindt Mint Chocolate Balls for other flavors like hazelnut, caramel, or dark chocolate.
For a non-mint version, omit the green coloring and use plain truffles.
Top with crushed candy canes or chocolate curls for a festive twist.
Make a larger version in a 20 cm springform pan (bake 30–35 minutes).


