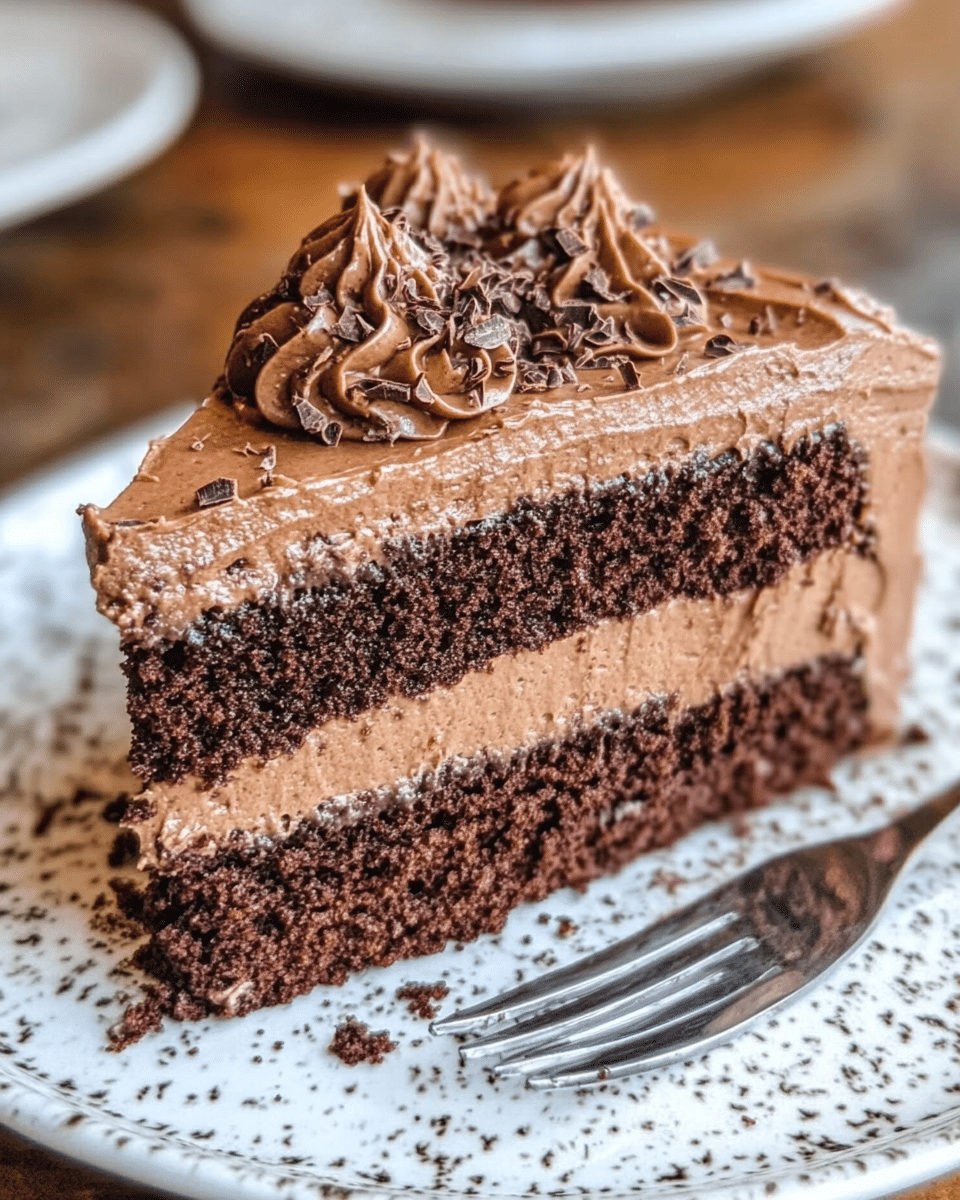
This classic Hershey’s chocolate cake recipe from the 1970s remains a timeless dessert that has delighted generations. Rich, moist, and deeply chocolatey, this vintage recipe delivers the perfect balance of sweetness and chocolate flavor that made it a household favorite during the disco era and beyond.
Why You’ll Love This Recipe
This vintage chocolate cake is a crowd-pleaser for good reason. The recipe creates an incredibly moist cake with a tender crumb that stays fresh for days. The deep chocolate flavor is intense without being overwhelming, and the simplicity of preparation makes it accessible even for novice bakers. What’s truly magical about this cake is how the addition of boiling water creates a thin batter that transforms into an exceptionally soft texture during baking. Whether you’re feeling nostalgic or simply craving an excellent chocolate cake, this 1970s classic delivers reliable results every time.
Ingredients
(Tip: You’ll find the full list of ingredients and measurements in the recipe card below.)
- All-purpose flour provides the structure for this cake, creating a tender yet stable base that supports the rich chocolate flavor.
- Hershey’s unsweetened cocoa powder is the star ingredient, delivering that classic, deep chocolate flavor that made this cake famous. The natural acidity in the cocoa powder also helps create a more tender crumb.
- Baking powder and baking soda work together as leavening agents to give the cake its perfect rise. The combination of both creates the ideal texture while balancing the acidity from the cocoa.
- Salt enhances all the flavors in the cake, particularly bringing out the richness of the chocolate. Without it, the cake would taste flat.
- Granulated sugar not only sweetens the cake but also contributes to its moist texture by retaining moisture during and after baking.
- Eggs act as binders that hold the cake together while adding richness. They also create structure and stability in the batter.
- Milk adds moisture and creates a tender crumb. Using buttermilk as an alternative adds a subtle tanginess that enhances the chocolate flavor even further.
- Vegetable oil makes this cake exceptionally moist and keeps it fresh for days longer than cakes made with butter. It also creates a lighter texture.
- Vanilla extract complements and enhances the chocolate flavor with its aromatic sweetness. It adds depth to the overall flavor profile.
- Boiling water might seem unusual, but it’s the secret to this cake’s success. It blooms the cocoa powder, intensifying the chocolate flavor while creating a uniquely light texture.
Directions
- Preheat oven to 350°F (175°C). Grease and flour two 9-inch round cake pans.
- In a large mixing bowl, combine flour, cocoa powder, baking powder, baking soda, salt, and sugar.
- Add eggs, milk, oil, and vanilla extract to the dry ingredients. Beat on medium speed for about 2 minutes until the batter is smooth.
- Carefully stir in the boiling water. The batter will be thin, which is expected.
- Pour batter evenly into the prepared pans. Bake for 30-35 minutes, or until a toothpick inserted into the center comes out clean.
- Let cakes cool in pans for 10 minutes, then remove and transfer to wire racks to cool completely.
- Once cooled, frost with your favorite chocolate frosting and enjoy!
Servings and Timing
This recipe yields approximately 12 servings, making it perfect for family gatherings or small celebrations. The preparation time is relatively quick at just 15 minutes, with a baking time of 30-35 minutes. In total, you can expect to spend about 50 minutes making this cake, not including cooling time. Each serving contains approximately 380 calories, making it a reasonably indulgent but not excessive dessert option.
Variations
- Classic Chocolate Buttercream Frosting: Pair this cake with a traditional chocolate buttercream for an authentic 1970s experience.
- Mocha Twist: Add 1-2 tablespoons of instant coffee granules to the boiling water to create a rich mocha flavor.
- Black Forest Version: Split the cake layers and fill with cherry pie filling and whipped cream for a quick Black Forest cake.
- Peanut Butter Lover’s Dream: Frost with peanut butter frosting for a delicious chocolate-peanut butter combination.
- Bundt Cake Variation: Bake in a bundt pan for 45-50 minutes and drizzle with a simple chocolate ganache for an elegant presentation.
- Sheet Cake Option: Pour all the batter into a 9×13 inch pan and bake for 35-40 minutes for a simpler, family-style cake.
- Cupcakes: Convert to cupcakes by filling liners 2/3 full and baking for 18-22 minutes. Yields approximately 24 cupcakes.
Storage/Reheating
- This vintage chocolate cake stays remarkably moist for several days when stored properly. To maintain freshness, store unfrosted cake layers tightly wrapped in plastic wrap at room temperature for up to 3 days. Once frosted, the cake can be stored in an airtight container at room temperature for 2-3 days, or in the refrigerator for up to 5 days.
- For longer storage, you can freeze unfrosted cake layers for up to 3 months. Wrap each layer individually in plastic wrap followed by aluminum foil. Thaw frozen cake overnight in the refrigerator before bringing to room temperature and frosting.
- If refrigerated, allow slices to come to room temperature before serving for the best flavor and texture. While reheating isn’t typically necessary for cake, you can microwave a slice for 10-15 seconds to restore that just-baked softness if desired.
- FAQs
Why is my cake batter so thin?
The thin batter is completely normal for this recipe and is actually one of its secrets. The addition of boiling water creates a thin consistency that results in an exceptionally moist and tender cake. Trust the process—the cake will set up perfectly during baking.
Can I use Dutch-processed cocoa instead of regular unsweetened cocoa?
Dutch-processed cocoa has a different acidity level than natural cocoa powder. For this vintage recipe, it’s best to use natural unsweetened cocoa as called for, as it reacts with the baking soda properly. Using Dutch-processed may affect the cake’s rise and texture.
Why does the recipe call for boiling water?
Boiling water serves two important purposes: it “blooms” the cocoa powder, intensifying its flavor, and it creates a thinner batter that results in a uniquely moist texture. This technique was popular in vintage recipes for good reason!
Can I make this cake without eggs?
Yes, you can substitute the eggs with either 1/2 cup unsweetened applesauce or 2 tablespoons of ground flaxseed mixed with 6 tablespoons of water (let sit for 5 minutes before using). The texture will be slightly different but still delicious.
How do I know when the cake is done baking?
The cake is done when a toothpick inserted into the center comes out clean or with a few moist crumbs (but no wet batter). The cake should also spring back lightly when touched in the center.
Can I use butter instead of vegetable oil?
While you can substitute melted butter for the oil, the cake won’t be quite as moist and may dry out faster. The oil is part of what gives this vintage cake its characteristic texture and extended freshness.
What’s the best frosting for this cake?
Traditional chocolate frosting is the classic choice, but this versatile cake pairs well with many options including vanilla buttercream, cream cheese frosting, or even a simple chocolate ganache.
Why did my cake sink in the middle?
A sunken center typically occurs if the cake is underbaked, the oven door was opened during baking, or if your leavening agents (baking powder/soda) are expired. Make sure to check their freshness and avoid opening the oven during the first 20 minutes of baking.
Can I make this as a single layer cake?
Yes, you can bake this in a 9×13 inch pan for about 35-40 minutes. This makes serving easier for casual gatherings and eliminates the need for layering and frosting the sides.
How can I intensify the chocolate flavor even more?
For an even richer chocolate flavor, you can add 1-2 teaspoons of espresso powder to the dry ingredients (coffee enhances chocolate flavor without adding coffee taste), or substitute strong brewed coffee for the boiling water.
Conclusion
This Vintage Hershey’s Chocolate Cake from the 1970s has stood the test of time for good reason. Its simplicity belies the remarkably rich, moist texture and deep chocolate flavor that continues to delight dessert lovers decades after it first appeared on American tables. The unusual technique of adding boiling water creates a cake with an exceptionally tender crumb that stays fresh longer than many modern recipes.
Whether you’re recreating a nostalgic dessert from your childhood or discovering this classic for the first time, this recipe delivers reliable results with basic pantry ingredients. The versatility of the cake makes it suitable for everything from casual family dinners to special celebrations. In a world of complicated dessert trends, this straightforward chocolate cake reminds us that sometimes the classics are classics for a reason—they’re simply perfect just as they are.
Print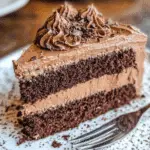
Vintage Hershey’s Chocolate Cake (1970s)
- Total Time: 50 minutes
- Yield: 12 servings
- Diet: Vegetarian
Description
A vintage Hershey’s chocolate cake recipe from the 1970s that is moist, chocolatey, and perfect for any occasion.
Ingredients
- 1¾ cups all-purpose flour
- ¾ cup Hershey’s unsweetened cocoa powder
- 1½ teaspoons baking powder
- 1½ teaspoons baking soda
- 1 teaspoon salt
- 2 cups granulated sugar
- 2 large eggs, at room temperature
- 1 cup milk (or buttermilk for richer flavor)
- ½ cup vegetable oil
- 2 teaspoons pure vanilla extract
- 1 cup boiling water
Instructions
- Preheat oven to 350°F (175°C). Grease and flour two 9-inch round cake pans.
- In a large mixing bowl, combine flour, cocoa powder, baking powder, baking soda, salt, and sugar.
- Add eggs, milk, oil, and vanilla extract to the dry ingredients. Beat on medium speed for about 2 minutes until the batter is smooth.
- Carefully stir in the boiling water. The batter will be thin, which is expected.
- Pour batter evenly into the prepared pans. Bake for 30-35 minutes, or until a toothpick inserted into the center comes out clean.
- Let cakes cool in pans for 10 minutes, then remove and transfer to wire racks to cool completely.
- Once cooled, frost with your favorite chocolate frosting and enjoy!
Notes
- For a richer flavor, use buttermilk instead of regular milk.
- The batter will be thin; don’t worry, as this contributes to the cake’s moist texture.
- Allow the cake to cool completely before frosting to avoid the frosting melting.
- Prep Time: 15 minutes
- Cook Time: 35 minutes
- Category: Dessert
- Method: Baking
- Cuisine: American
Nutrition
- Serving Size: 1 slice (1/12 of the cake)
- Calories: 380
- Sugar: 30g
- Sodium: 320mg
- Fat: 15g
- Saturated Fat: 2g
- Unsaturated Fat: 11g
- Trans Fat: 0g
- Carbohydrates: 56g
- Fiber: 3g
- Protein: 4g
- Cholesterol: 35mg

